How To Create a Top Left Corner Image with a Fading Color
Q
How To Create a Top Left Corner Image with a Fading Color? - PSP Tutorials - Fading Images to Background Colors with PSP
✍: FYIcenter.com
A
If you want to put background image to the top left corner of your Web page, you need to fad the right lower part of the image to the background color. The tutorial below tells you how to create a top left corner image with a fading color:
- Continue with the previous tutorial.
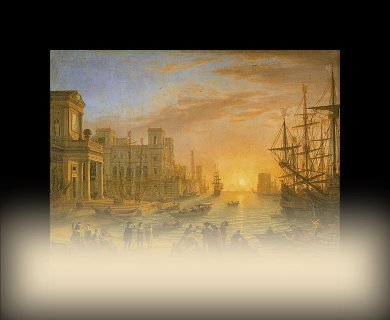
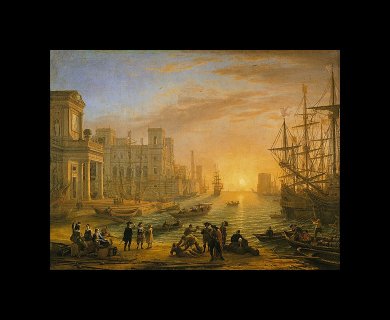
- Open the image: port_with_faded_edges.jpg. It has 780x640 pixels.
- Add a new raster layer.
- Create a fading edge on the right side by following the steps in the previous tutorial.
- Add another new raster layer.
- Use the rectangle selection tool with feather=75, and select the right bottom part of the image starting at position=(200,200).
- Use Flood Fill tool with color of RGB=(240,224,192) to fill the selected area.
- Select the Selection tool again, and press right mouse button to release the selected area.
- In the Layer Palette, move the Opacity scale to 85% on the last layer. You will see some background image starting to show up in the faded area.
- Merge all layers.
- Use the rectangle selection tool with feather=0, and select the center part of the image without the margins.
- Press Ctrl-C and Ctrl-V to copy and paste a new image.
- Save the new image as port_as_top_left_corner.jps. It will look like this:

2007-05-12, 6091👍, 0💬
Related Topics: